Saturday, May 26, 2012

Gnocchi di Patate

Dear Bloggers,
     It was quite a lovely meal that I made last evening. Yes, I am posting this late and hopefully my apology is accepted. I made potato gnocchi with fresh focaccia bread. These gnocchi were super easy to make and honestly didn't take much time, just patience and care. The focaccia of course took hours, but that's because it's bread and we all know what goes into good bread. So I began with 3 pounds of cold, peeled, mashed russet potatoes, 2 cups of white flour (preferably 00 because it is finer and allows for a smoothers gnocchi), 1 cup of parmigiano reggiano (or 1/2 parmigiano and 1/2 peccorino romano), 1 teaspoon of nutmeg, and salt and pepper to taste. Once you combined the dry ingredients together in a mixer, add the potato and wait until it forms a smooth dough. At first, they will resist combining and then they will form a dough. Have patience and do not add water! Once the dough is done, roll the gnocchi into cigar shapes and cut strait down to form 1/2 inch pieces. Boil them in salted water & wait until the first one floats. Then, in a saucepan add olive oil, chili flakes, garlic, and basil and add the gnocchi straight from the boiling water with just a little starch water. Cook until golden brown, then serve with freshly grated parmigiano reggiano and basil. Super easy! Although, I wasn't impressed with the consistency that these gnocchi produced, they were not smooth, they were almost too rubbery. Next time I will add 1 egg and mix the dough much more carefully. That is key to making a perfect dough; loving it and kneading it until perfection. I hope that you are all having a wonderful summer and whatever it is you may be doing is bringing you peace and happiness. Until next time, from my new apartment, stay healthy and happy cooking!

Friday, May 18, 2012

The Last Before The Beginning

Dear Bloggers,
      I am writing you today with some exciting, yet sad news. Today I made my last meal in an actual beautiful kitchen, and in about 4 days, I will be cooking in my new apartment. Well, my home, but it will be hard because the kitchen is so small and I've been so spoiled working in a beautiful environment with granite counter tops, now I will be down-grading, but that certainly does not mean that any of the food will taste any lesser. So today, I made something so simple because I spent all day packing up Shelly (my car) and washing her, getting her all ready to travel to Tennessee tomorrow. Wow, I can't believe that it's actually tomorrow. Anyways, I quickly threw together something delicious and light because I little time. I cooked some orchiette then added 1 teaspoon of butter along with fresh basil. Light and simple and oh so delicious. Sometimes it's the simple things in life that taste the best, Well, as for the blogging, you guys will not be blessed with my writing for a few days. Seeing as I have no followers, this will not seem to affect anyone, haha. Wish me luck though & pray that nothing dangerous happens. I hope that we will arrive safely and happily. Well, until next time continue to stay healthy and happy cooking!

Thursday, May 17, 2012

A Final Mexican Pleasure

Dear Bloggers,
     I've been dabbling into some fun delicious spanish meringue and salsa music. I guess that brought out the fire for my craving of some delicious mexican food. Today, of course I made a meal from those fresh fusilli that I made the other night. Although, I did not anticipate that I would make so little food. I boiled the fresh handmade fusilli for 5 minutes. In a pan I sautéed 1 chopped tomato, 1 fresh clove of diced garlic, olive oil, salt, pepper, 4 quartered Spanish olives, and basil. I added the fusilli and let it cook for 3 minutes. I ate it immediately to find absolute and pure satisfaction. Oh dear, it was very little, yet it was so yummy. From the first to the last bite, it made me truly appreciate homemade pasta and yes, it is work all of that extra work to have a fresh pasta.
     To satisfy that craving of Mexican food, we decided to head over to La Fiesta Taqueria and it was traditional Mexican food. Now that I will be moving to Tennessee permanently, the selection of fresh Mexican food is quite limited and living in California, I am spoiled to have all of those beautiful border hoppers share their cuisine with us. I ordered the Chile Verde and was more than perfectly satisfied. I was blown away by the intricate amount of flavors in the chile verde sauce and how perfectly everything on the plate went together. Sure it came with just a side of refried beans, rice, and guacamole. It was all of that I had missed because from being away from it that long, I realized how good it was. So I made some chile verde soft tacos and gobbled them up so quickly. If you are ever in Sacramento, be sure to go to this restaurant as it is delicious, authentic, and quite inexpensive. Anyways, have a peaceful night and continue to stay healthy and happy cooking!

Wednesday, May 16, 2012

Is She Italian or Russian?

Dear Bloggers,
       Now I am questioning what ethnicity I am seeing as I perfectly made Pirozhki for the first time. Yes, and they were so time consuming and quite easy. It wasn't just making the dough, then preparing the stuffing, then forming them. It was the tender loving care it took to make them taste amazing and fluffy inside.
        It all began with my first blog of the Russian diet and what composed it and why. There I stumbled upon this beautiful creation, the pirozhki. After carefully examining it and seeing different ways to cook the pirozhki I decided to make the traditional pirozhki which consist of ground beef, onion, and cabbage filling. I began by making the dough where I combined 1 package of yeast with 1 teaspoon of sugar, and 1/4 cup of 114 degree water. In a bowl to the side, I started with 2 cups of flour. In pyrex glass cup I heated up 1 cup of almond milk (original recipe calls for whole milk, but I'm lactose intolerant) with 1 teaspoon of honey. I whisked 2 eggs in a bowl with 2 teaspoons of salt and mixed the eggs with the milk. I added the milk and eggs to the flour and then added the yeast. Make sure that your milk mixture does not exceed 115 degrees as it will kill the yeast. Then I gradually added in more and more flour until a perfect dough was formed. I oiled the dough in a bowl and let it rise in the oven with the light on for 1 1/2 hour.
       While the dough was rising, I diced 1 yellow onion and put it in a saucepan with 2 teaspoons of olive oil and began to cook the onions, then added in 1 pound of ground turkey. I seasoned with 2 teaspoons of dill, salt, and pepper, and 1 teaspoon of ground turmeric. I put it aside in a bowl. In the same pan, I added some more olive oil and cooked down 1/2 chopped cabbage with salt and pepper, then added the cabbage to the ground turkey and onions. I then hard boiled 2 eggs and chopped them and added them to the turkey mixture in the bowl. Once the dough was done rising, I formed golf sized balls (makes approximately 30) and put them on baking sheets lined with flour. Then, I put them back into the oven to rise for another 30 minutes.
        Then I rolled out the individual balls into 3-4 inches in length and 5 inches in diameter. I filled them with the turkey mixture, 2 teaspoons at most, then lined the edges with egg to seal. I then folded the two edges in and placed them seam side down on a greased baking sheet. I painted egg wash onto the dough and salted them before I cooked them for 15 minutes on 400 degrees. They turned out beautifully and deliciously. I guess you could say I'm Russian secretly, haha. I served the pirozhki with a warmed spiced tomato soup. It was quite a yummy meal. Well, I hope you try this recipe and don't run away in fear, despite its time consumption of 4 hours. Yes, 4 hours, but it all paid off when they came out of the oven. The smell in the house is indescribable. Until next time, stay healthy and happy cooking!

Tuesday, May 15, 2012

Handmade Pasta from the Napolitan

Dear Bloggers,
      WOW! What a day! I cannot believe that I will driving to Tennessee this time next week and hopefully arriving around now. I just cannot believe it. Today I accomplished quite a goal, to successfully make handmade pasta. I made two types of pasta, le linguine and i fusilli lunghi. I simply began by creating a well with flour and 1 egg and slowly mixing the two together until a perfect dough was formed. After, I rolled it out into a thin long sheet. After, I folded the sheet into quarters and re-rolled it out. Once rolled thinly again to the size of the first long sheet, I folded it back up into sixths. I rerolled it for the final time until I maintained another long thin sheet. This process allows the pasta to be as smooth and elastic as possible. Yes, with a pasta roller it would have been a lot easier, but that's where the workout comes in by rolling it with a marble pastry roller. Fun! Once the thin sheet was rolled out, I cut the edges to make them all even and folded it long ways to create a roll with multiple sheets. In between each sheet I added a good amount of flour to prevent the pasta from sticking while cutting. I simply ran my knife along the roll of pasta and cut them in 1/8th dices, then pulled them all apart and laid them out to dry. These are the linguine. If you want to create i fusilli lunghi, simply take the linguine and wrap them around a pencil and press the ends in on each other then lay out on a cutting board to dry.
           So simple and so delicious! This pasta looks beautiful and will make an excellent meal later on. After today, I know what I'm going to do for the rest of my summer, master pasta and bread making because after that, I know my skills will improve tremendously. Well until next time, I hope you continue to stay healthy and happy cooking!


Monday, May 14, 2012

Roasted Spaghetti Squash & Mixed Beans Quinoa

Dear Bloggers,
       Come aveva la tua giornata? Hopefully your day was just as wonderful as mine as well. I volunteered some time to help my step ma in her classroom and clean up, grade papers, organize papers, and just enjoy the presence of seventh graders once again. It was fun and and entertaining as one kid in her sixth period class was attempting to flirt ridiculously and trying to get my attention while I was grading papers. It was great and adorable. Anyhow, I got back and decided to cook up a meal with so much heartiness and nutritional value because I hadn't eaten much throughout the day.
       I cleaned up a spaghetti squash by cutting it into thirds and removing the seeds and excess pulp. I placed them into a ceramic dish with a 2 inch water bath and decorated the squash with olive oil, salt, pepper, red onion slices, and fresh parsley. I roasted them on 400 for 35 minutes until almost fully done. You do not want the squash to be overcooked and too tender at this point because it will be cooked additionally with the quinoa. In a saucepan, at the same time, I cooked 32 oz of chicken stock with mixed beans (whichever you like) fresh sage, and pepper until done. When the squash was finished, I removed it from the oven and began forking it until all of the squash was clean from the peel. In a pan, I added 1 teaspoon of olive oil with 2 roughly chopped tomato, and a half finely diced red onion. I added 1 1/3 cups of quinoa with 2 cups of water and let simmer on low. After adding the squash to the quinoa, tomatoes, and onions, I added the beans and 2 leaves of sage then let cook on low, covered for 40 minutes. I removed it from the heat and served it immediately with a leaf of fresh sage.
      This meal was outstanding in flavor and health benefits. Quinoa is the only grain known to man that is  classified as a protein because it contains 8 of the essential amino acids. In addition, the squash we added incorporates a significantly high amount of fiber and omega 3 fatty acids. YES! So, you simply cannot turn away from this dish when it tastes this spectacular and fuels your body with so much nutrition. Well, maybe you'll stop reading this now and get to cooking this recipe! Until next time, lovelies, stay healthy and happy cooking!

Saturday, May 12, 2012

Radiatori Alla Carbonara

Dear Bloggers,
       Ok, I've been quite a typical Italian Californian and have spent the first 4 hours of my day tanning and relaxing by the pool. Although, it would have been more majestic by the ocean. Anyways, I got back from tanning and thought, well I have to make a meal today for my readers because tonight we are taking my step mother out for a mother's day dinner. I was thinking ok, pasta alla carbonara; delicious and nutritious. So I was looking around the pantry and saw radiatori which are beautiful spiral pasta with such a hearty bite, so I was like, what the hell, we'll modify. I began by cooking the pasta for 8 minutes until al dente, then in a saucepan I melted 2 tablespoons of butter and added the pasta and a little of the pasta water once cooked. I let it cook for 3-5 minutes to let all of the butter incorporate flavor into the radiatori. Then, on the side I mixed one egg, 1 clove of garlic, salt, pepper, basil, and parmigiano reggiano. I took the pasta off the heat and added the egg mixture and stirred it all together until well incorporated. You have to make sure the pasta is off the flame when adding the eggs or you will end up with fried egg bits in your pasta and that is not part of the dish. I plated the pasta with more fresh parmigiano reggiano and 2 sprigs of basil. Such a yummy dish for lunch that added carbohydrates to your day and still allows you plenty of time to burn them off throughout your busy day. Well, until next time, I hope you enjoy this recipe and stay healthy and happy cooking!

Friday, May 11, 2012

Le Pizzette di Napoli

Dear Bloggers,
        Today I was inspired to make some delicious pizza and make them far from the traditional Napolitan pizzette. I decided in the beginning of the day to make a quinoa dish with squash, tomatoes, and zucchini, however, I didn't have all of the ingredients. Thus, I improvised and made pizza, haha. I began by making the pizza dough with 2 1/2 cups of sifted flour, 1/2 cup of water, salt, 1/4 cup of olive oil, and the active yeast. I formed the dough and let it rise for an hour and forty five minutes. Then, I placed them in the pans and let them rise for an additional hour. I mixed up some leftover ricotta with spinach, salt, pepper, and a smidgen of rosemary and decorated my first pizza with the mixture. I added some sliced tomatoes to the top and drizzled it with olive oil. For the second pizza, I placed a thin layer of mozzarella cheese, then thinly sliced potatoes with salt, pepper, and rosemary. I drizzled it with olive oil and topped it with a few sprigs of fresh basil. I baked them for 15 minutes on 390 degrees. It was such a simple meal, delicious, beautiful, however, I would say that they could've been better. I wasn't too impressed by the dough. I had high expectations of how the dough could've turned out. Next time what I will do is bake the focaccia bread from the previous recipe and then dress them and let them cook for an additional 10 minutes to allow that beautiful rise in the bread which was absent this time around. Anyways, give these recipes a try and see how you like them yourselves. Until next time, stay healthy and happy cooking!


Wednesday, May 9, 2012

Fusilli Con Ricotta e Bruschetta

Dear Bloggers,
        Ahhhh the fresh fragrance of basil picked straight from the garden and fresh vine ripened tomatoes with fresh garlic, soothes my soul. Today I wanted to head North and compliment them on they're white pasta. You may not be aware, but within every different region of Italy, food changes and is known specifically for its location. In northern Italy, they cook with a lot of cream sauces, white sauces, and greens. In the south they cook a lot of red sauces, a lot of seafood, and tend to use more olive oil opposed to butter. Fusilli con ricotta is a classic dish eaten predominantly among the northerners, however, we in the south do enjoy this meal sporadically.
          Now that you have some education on the background of this dish, let me discuss how I cooked it. I began by cooking the pasta for 8 minutes, until al dente. On the side, I combined
ricotta with diced spinach, garlic, olive oil, chili flakes, and salt and pepper to taste. I also cut up some fresh whole wheat bread and dressed it with olive oil and garlic. I toasted it in the oven until perfectly golden brown. For the bruschetta, I chopped some tomatoes, basil, salt, and pepper. Once the pasta was cooked, I added it to a pan with the ricotta and spinach and let cook for 10 minutes until well incorporated. Once the bread was done, I topped it off with the tomatoes and basil and served it immediately. So simple and so beautiful. The most satisfying part of tonight was cutting into the basil leaves and knowing that summer was just in bloom. Until next time my readers, stay healthy and of course, happy cooking!


Tuesday, May 8, 2012

Freshwater Lemon Sole with Yams and Asparagus

Dear Bloggers,
         Ok, I'm not gonna sugar-coat this and beat around the bush, I've had just a not so hot day. Everything that could've gone wrong did and I  suppose that I felt like the world was working against me. However, this meal didn't go wrong and I simply cannot complain because my mouth was so happy when I took a bite into my food. I began with wild caught sole fish and marinated the sole with olive oil, lemon pepper, lemon juice and it's grind, dill weed, thyme, and parsley in the fridge for 20 minutes. I cooked it in the oven on 375 degrees for 15-20 minute in a pyrex dish filled with 1 inch of water. I placed the sole in foil and topped it with two slices of lemon and closed the foil around the fish like a pocket. On the side, I cooked up some asparagus with olive oil, salt, pepper, chili flakes, and oregano in a pan. I cleaned the asparagus ends by peeling off a thin layer from the bottom and slicing them diagonally to ensure they cooked evenly with the entire asparagus. In another pan with tablespoons of olive oil, I diced up some rounds from a peeled yam and seasoned the yam dry with lemon juice, salt, pepper, parsley, and garlic powder. I then browned the yams in the pan for 15 minutes until perfectly cooked. I plated the sole on top of the asparagus with a fun decoration of yams to the side. Simple dish with phenomenal flavor and excellent nutritional value; I could not have been happier with this meal. Until next time, stay healthy and happy cooking.

Monday, May 7, 2012

At Last, True Satisfaction

Dear Bloggers,
      Today I accomplished yet another high goal I set for myself, preparing focaccia bread that was absolutely delicious. I of course prepared a meal this evening, however my eyes were set on the focaccia and how amazing it turned out. Now, as well all know, bread making is an art and you have to be gentle, patient, and kind when kneading and rising. You really have to grow a bond with your bread or you truly will not have a beautiful work of art. This evening I prepared some season-steamed artichokes with a side of lentil split pea orzo. To make the artichokes, I began by cutting off the stem to the room of the artichoke, to create a flat surface. Then I chopped off the top leaves and trimmed the sharp edges along the remainder of the artichoke. I cleaned out the inside by removing the florets and prickly leaves. I drizzled them with olive oil and added some garlic, salt, pepper, and thyme and let them simmer on med-low for 25 minutes. On the side, I added split peas, lentils, water, salt, pepper, and thyme to a pot and let the legumes simmer on med-low for 35 minutes. Then I added 1 cup of orzo to the legumes and let it cook an additional 45 minutes. I added some flour to thicken the mixture and plated it as a bed underneath the artichoke. To the top of the artichoke, I added a dollop of basil garlic butter.
         Now to the focaccia! As I blogged about earlier, there is a recipe regarding the focaccia a few blogs below. After following her directions perfectly, my focaccia came out much more crunchy and moist than any that I could've ever purchased at a supermarket. You could add anything to this focaccia, but it's buttery flaky flavor that the olive oil adds just makes this bread stupendous. The little  pockets of love, and the buttery center, and the beautiful crunch when you bite into this bread. You could top it off with some bruschetta, insalata caprese, or even some pesto. Anything, and serve it as an appetizer. I have not a complaint in the world about this bread because it makes your mouth water. Anyways, I hope I've tantalized your taste buds enough for one night, until next time, stay healthy and happy cooking!

Sunday, May 6, 2012

A Little Tabbouleh Touch

Dear Bloggers,
            What a beautiful day it has been; so relaxing and smooth. I accomplished a huge goal today, I ran 5 miles in 47:30 minutes and could not have felt more proud. I also picked up some small things for my professional section of my closet, so now I will be prepared for more business meetings within my new major. Today the subject is Tabbouleh and its magical effect on the human body. Tabbouleh is made with a few simple ingredients: 1 cup of water, 1/2 cup of bulgar, 1/4 cup lemon juice, 2 tblsp olive oil, 1/2 tsp minced garlic, salt and pepper to taste, 1 cup flat leaf parsley, 1 cup curly leaf parsley, 1/4 cup chopped mint, 2 diced tomatoes, 1 cucumber diced, and 4 scallions diced. First you begin by soaking the bulgar in a bowl. Then you add all of the following ingredients to the bulgar and stir until perfectly combined. Refrigerate with plastic wrap over the bowl and serve after 3-4 hours of chilling. It is delicious and is so healthy for you. A hearty grain packed with all of those yummy veggies. You simply cannot go wrong with this dish, but before you make it, make sure you truly love parsley, because tabbouleh is dedicated to honoring parsley and all its glory. Until next time my dear, stay healthy and happy cooking!

Saturday, May 5, 2012

El Cinco De Mayo!

Dear Bloggers,
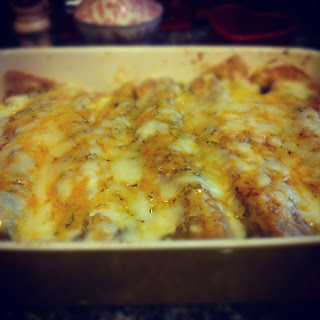
          Feliz cinco de Mayo! I don't speak Spanish well at all, just Italian, but today it's special because MEXICO WON THE WAR BETWEEN FRANCE IN 1862! Yea, so we have to celebrate, being in California, because we love our immigrants. So today, I decided that it would be lovely to accompany my father's fiance in cooking some homemade pork enchiladas, fresh salsa and chips, and some Mexican seasoned asparagus; I had to add some healthiness to this meal. I first began by seasoning a cut of pork shoulder in 1 teaspoon of salt, 1 teaspoon of pepper, 1 teaspoon of cayenne pepper, 1 teaspoon of paprika, and 1 teaspoon of red chili flakes. I added 2 teaspoons of olive oil to the bottom of a dutch oven and let it heat up. One heated, I braised the pork shoulder until beautiful golden brown, about 5-8 minutes. Once fully braised, I added 32 oz of chicken stock (which ideally would've been pork stock, but I had none), 2 handfuls of cilantro (stems and all, because they were going to be removed), 2 small yellow onions, quartered, 4 small tomatoes, quartered, and 2 teaspoons of oregano. I put the lid on the dutch oven and let it cook on the stove on med-low for 4 hours, or until perfectly cooked. Once done, I pulled it out and put it on a plate, covered with foil (so all of the juices would remain inside) and let it cool for about 30 minutes. Once done, I simply began shredding the pork with my hands; which you could also do with a fork.
       Then took a container of chili verde that I bought from Trader Joe's and emptied half of it into an 8x10 pyrex dish and dipped the whole wheat tortillas in it and filled them with the shredded pork and some grated cheddar and monterey jack cheese. I repeated this process until the pyrex dish was loaded with enchiladas. After I poured the remainder of chili verde on top and added some more shredded cheese. I put it in the oven covered with foil at 350 degrees for 15 minutes, then removed the foil and cooked for 5 minutes.
         On the side, I fried up some quartered corn tortillas to make chips. I also made some salsa with 4 diced tomatoes, 1/2 diced red onion, 1/2 cup diced cilantro, 1/4 cup diced jalapenos, 1 tablespoon of fresh lime & 1 teaspoon of lime zest, 1 teaspoon of olive oil, and salt and pepper to taste.
        To make this meal slightly healthier, I cooked up some asparagus in a skillet with 1 teaspoon of olive oil, 1/2 teaspoon of oregano, 1/4 teaspoon cumin, 1/2 teaspoon paprika, and salt and pepper to taste. I added some water to add a tender texture. Overall, this meal was absolutely delicious and the margarita I made on the side with 2 cups of strawberries, 3/4 cup tequila, 1/2 cup orange juice, 1 tablespoon of lime juice, and 1 cup of ice, just completed the meal. Well cheers! Give this recipe a try because it simply was delicious! Until next time, stay healthy and happy cooking!


Friday, May 4, 2012

And She Scores Again

Dear Bloggers,
        Today started off horribly when I headed over to Gold's Gym to get in a solid workout and was told that I couldn't workout if I didn't have an interest in becoming a member because I lived in Tennessee. I didn't feel very welcome. Along with all the stress of having to pack all of my stuff in preparation for my move, I guess I was just having a slightly unstable morning. As I moved along the day, I made the protein bars that I had recently blogged about and speaking honestly, they were so much healthier and better tasting than any protein bar you can buy at the supermarket. If you are interested in making it, see the blog below. So, tonight am I sitting, relaxing, sipping on this white wine and reflecting the delicious Seafood Couscous Paella that I made tonight. Originally the recipe called for saffron and fennel seeds, however I tried to make it work without those essential ingredients and substituted them for a dash of curry powder and paprika. Yes, just for the color. I began by sautéing 1 diced onion in 2 teaspoons of olive oil. After 3 minutes on medium heat, I added dill, pepper, curry powder, paprika, and thyme. One cooked, I added 1/4 cup of vegetable broth with 1 chopped tomato. I let it cook and then added 1 cup of water to 1 cup of couscous and poured it into the pan. After simmering for 2 minutes, I added the shrimp and continued to keep it covered. After 5 minutes, I turned the heat off and served it immediately. It was absolutely astounding! The flavors all combined so beautifully and the shrimp was cooked so perfectly. As well all know, shrimp can overcook within a matter of 30-1 minute. What a sensitive little crawfish. Haha, but anyways! I hope you try this recipe. Until next time stay healthy and happy cooking!


Thursday, May 3, 2012

Ravioli Piccanti Con Polpette Al Sugo

Dear Bloggers,
           Good evening! How has your day been? Mine has been quite marvelous, thank you. I watched a reasonable amount of Food Network today and yes, that included At Home with Giada De Laurentiis. I also was able to purchase an exceptional amount of items for my new apartment, including major furniture items, which honestly, made me feel so much better from Ikea. I found a beautiful dining room table and some miniature chairs (they're not the nicest, but they certainly provide a place to sit). Let's get down to business though and discuss the Ravioli Arrabiati Con Polpette Al Sugo. Yes, I just said angry ravioli with meatballs and marinara sauce. I began by making my meatballs with ground beef, 1 egg, bread crumbs, parsley, basil, salt, pepper, thyme, oregano, onion, and parmigiano reggiano. I popped them into a 1/4 inch olive oil pan and cooked them until perfectly done. In a pot on the side, I poured in a simple basil and tomato sauce and dropped the meatballs into the sauce once they were cooked. Separately, I boiled salted water in a pot and let the ravioli cook until perfectly tender. With the remainder of olive oil from the meatballs, I combined paprika, red chili flakes, fresh garlic, basil, and chili powder. Once the mixture had heated up, I added the ravioli, allowing a slight amount of the ravioli water to enter the oil mixture. I cooked the ravioli until perfectly golden. I plated the ravioli with two meatballs on the side and some tomato sauce. Super easy and one of the most amazing dishes I have ever made. I promise. After seeing Giada make something similar to mine (she used 2 sticks of butter, which I simply could not bring myself to do), I think mine couldn't even compare to hers. On the other hand, this dish was absolutely astounding and is still lingering on my tongue. As for you, give this a try and in the meantime, stay healthy and happy cooking!